Get started in under two minutes
The setup wizard asks a few simple questions, then you're communicating. No accounts to create. No software to download. Just open the link and go.
How Setup Works
When you first open Pie Talker, the setup wizard walks you through six steps. Each step takes a few seconds. The entire process is designed to get you communicating as fast as possible while still personalizing the experience.
You can skip the wizard entirely if you prefer — the Quick Start button at the bottom of the first step loads sensible defaults and takes you straight to the communication grid. But spending a minute on setup makes the app significantly more useful from the very first tap.
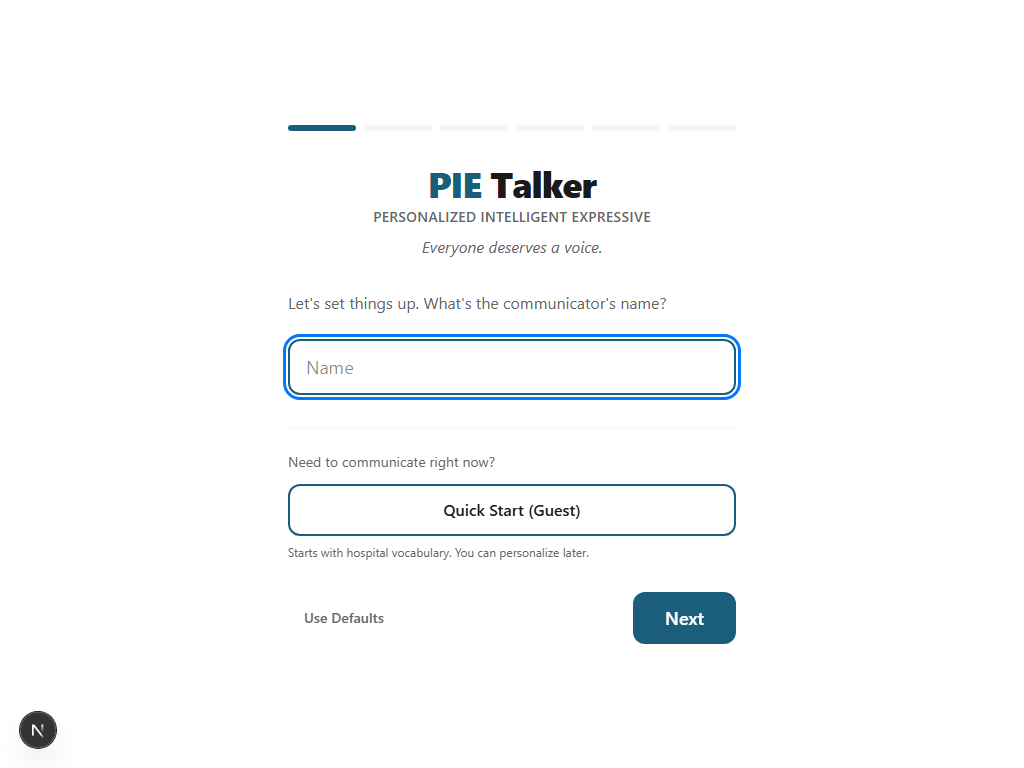
Name
Enter the communicator's first name. This personalizes the experience and appears in greeting tiles. If you are setting up on behalf of someone else, use their name.
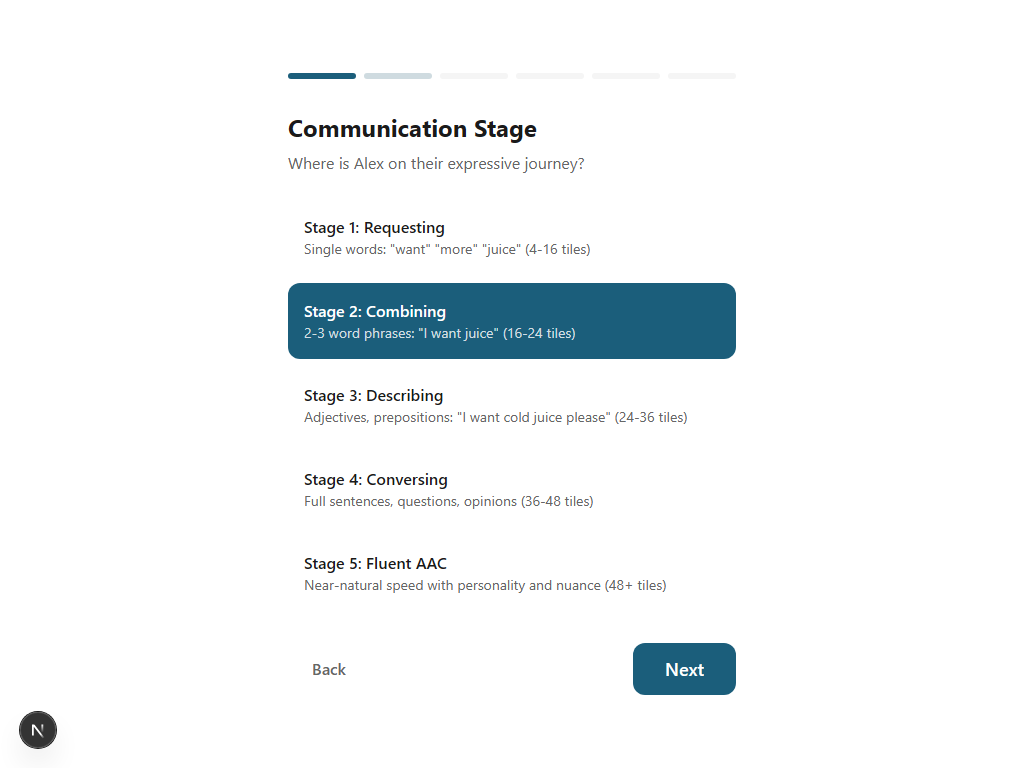
Communication Stage
Choose from five stages: Beginning Communicator, Early Words, Building Sentences, Confident Communicator, or Fluent AAC User. This controls how many tiles appear on the grid — fewer for beginners, more for advanced users. You can change the stage at any time in Settings.
Vocabulary Packs
Select the life context packs that match the communicator's daily life. Options include Core Communication, Early Learning, School Life, Social & Fun, Medical & Care, Independent Living, Workplace, and more. Each pack adds relevant vocabulary to the grid. Select as many as you need.
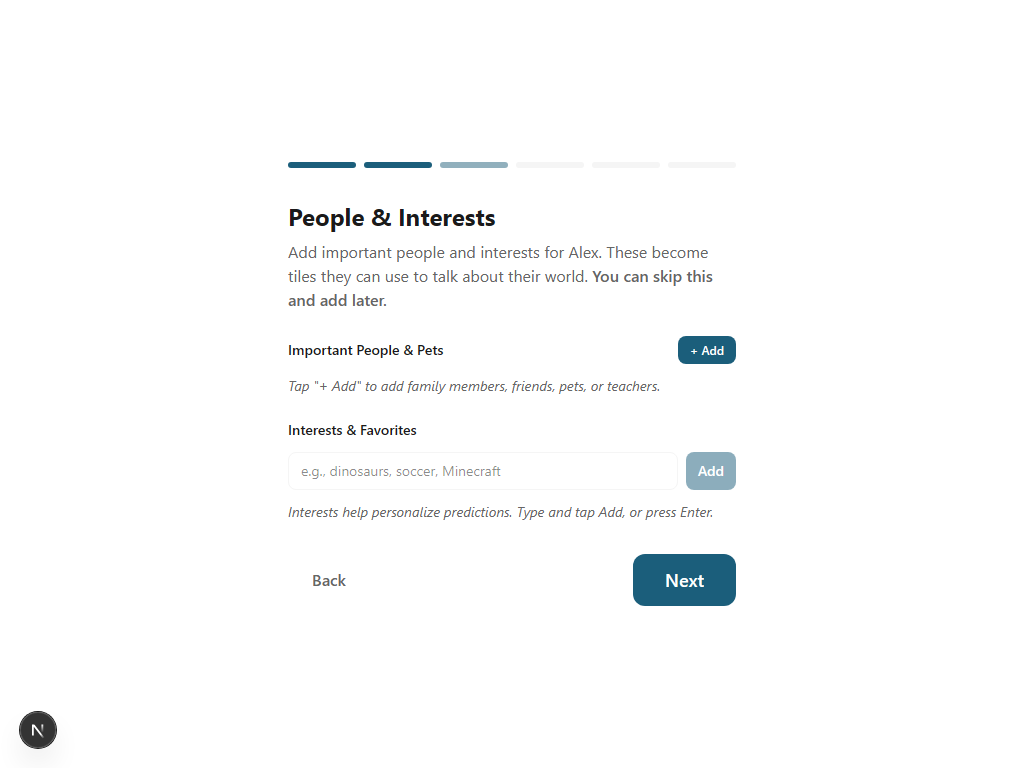
About the Communicator
Add family members with their roles (e.g., "Mom," "Brother," "Speech Therapist"), pets, and interests. This is the step that makes Pie Talker truly personal — the app uses this information to auto-create tiles and boost relevant predictions.
Language
Select a display language and a speech language. These can be different — for example, a Spanish-speaking child can see tile labels in Spanish while the device speaks English to the teacher. 17+ languages are available, powered by ARASAAC.
Look & Feel
Choose a visual style: Playful, Modern, Classic, or High Visibility. These are aesthetic preferences, not age categories — anyone can use any style. Pick light mode or dark mode, and optionally set an accent color. The app looks and feels different based on your choice, but the features are identical.
The "About" step: your world, built into the app
This is the step that makes Pie Talker feel personal from the first moment. When you add family members, pets, and interests during setup, three things happen:
- A "My People" folder is auto-created with tiles for each person — tapping "Mom" speaks "Mom"
- Each person gets a role label (e.g., "Dad," "Sister," "Teacher") so the app knows who they are in the communicator's life
- Interests and dietary information feed into the prediction engine, so relevant vocabulary appears more often in suggestions
You can add more people and interests later in Settings → Profile → About the Communicator. Everything added during setup can be edited or removed at any time.
Quick Start: Skip the Wizard
If you need to get communicating immediately — in a hospital room, a first therapy session, or an emergency — the Quick Start button on the wizard's first step bypasses all setup questions and loads the app with sensible defaults.
Quick Start uses these defaults:
- Communication Stage 3 (Building Sentences) — a balanced grid density
- Core Communication vocabulary pack — the essential everyday words
- English language for both display and speech
- Playful visual style in light mode
You can personalize everything later through Settings. The point is: the app works well even if you never touch a single setting. The defaults were chosen so that someone who opens the app for the first time and taps Quick Start can immediately begin communicating.
After setup: ready to communicate
As soon as you complete the wizard (or tap Quick Start), the main communication grid appears. The grid is populated with vocabulary based on the packs you selected, organized into folders, and ready to use.
Tap any tile to hear the word spoken aloud. Tap multiple tiles to build a phrase. The green Speak button reads the entire phrase as a sentence. It really is that simple.
If you added family members during setup, you will find a "My People" folder on your grid with tiles already created for each person. If you selected the School Life pack, school-related vocabulary is ready to go. Everything is immediate.
Tips for Getting the Most Out of Pie Talker
Pie Talker is a web app — share it with a URL. Send the link to teachers, therapists, or family members. When they open it, they can set up their own communicator profile on their device. Each device has its own independent profile stored locally.
For the best experience, install Pie Talker to the home screen. On most devices, the browser will prompt you to "Add to Home Screen" or "Install." Once installed, it opens full-screen like a native app, works offline, and launches instantly.
- Chrome (Android/Desktop): Tap the three-dot menu, then "Install app" or "Add to Home Screen"
- Safari (iOS): Tap the Share button (square with arrow), then "Add to Home Screen"
- Edge: Click the install icon in the address bar, or use the three-dot menu
The User Guide covers every feature in detail. It is accessible from within the app (Settings → More → User Guide) and as a standalone page.
Explore more
Two minutes to your first word
No accounts. No downloads. Open the link and start communicating.
Start Talking — Free